How to Make Your Own Facial Oil at Home
Why Make Your Own Facial Oil?
Facial oils have gained immense popularity in recent years due to their natural and nourishing properties. Many people are now turning to homemade facial oils as they offer several advantages over commercial products. By making your own facial oil at home, you have complete control over the ingredients used, ensuring that they are organic and free from harmful chemicals. This allows you to customize the oil according to your skin's specific needs and preferences. Additionally, creating your own facial oil can be a cost-effective alternative to purchasing expensive store-bought options. Let's explore how you can easily make your own facial oil using natural ingredients!
Gathering the Necessary Ingredients
Before you start making your own facial oil, it's important to gather all the necessary ingredients. Here's what you'll need:
Organic Carrier Oil
The first ingredient you'll need is a high-quality organic carrier oil. Carrier oils are typically derived from plants and serve as the base for your facial oil blend. Some popular options include jojoba oil, argan oil, and rosehip oil. When choosing a carrier oil, consider your skin type and its specific needs. For example, jojoba oil is great for all skin types and helps balance sebum production, while argan oil is rich in antioxidants and suitable for dry or mature skin. Rosehip oil is known for its anti-aging properties and can benefit those with aging or damaged skin.
Essential Oils
In addition to a carrier oil, you'll also need essential oils to add fragrance and additional skincare benefits to your facial oil. Essential oils are highly concentrated plant extracts that offer various therapeutic properties. Some popular choices for facial oils include lavender, tea tree, and rosemary essential oils. Lavender essential oil has calming properties and is suitable for all skin types. Tea tree essential oil has antibacterial properties and can help with acne-prone skin. Rosemary essential oil is known for its toning effects on the skin.
When selecting essential oils, consider your skin type and any specific concerns you may have. It's important to choose high-quality organic essential oils to ensure their purity and effectiveness in your homemade facial oil blend.
Now that you have gathered all the necessary ingredients let's move on to the next step: mixing the oils!
Mixing the Oils
Once you have gathered all the necessary ingredients, it's time to mix the oils together to create your own personalized facial oil blend. Here's how you can do it:
Measurements and Ratios
To ensure a well-balanced facial oil blend, it's important to follow the right measurements and ratios. A general guideline is to use 1 part essential oil to 4 parts carrier oil. This ratio allows for a gentle and effective concentration of essential oils in your facial oil. However, feel free to adjust the ratio based on your personal preferences and your skin's reaction. If you prefer a stronger scent or more potent effects, you can increase the number of drops of essential oil accordingly.
Blending Process
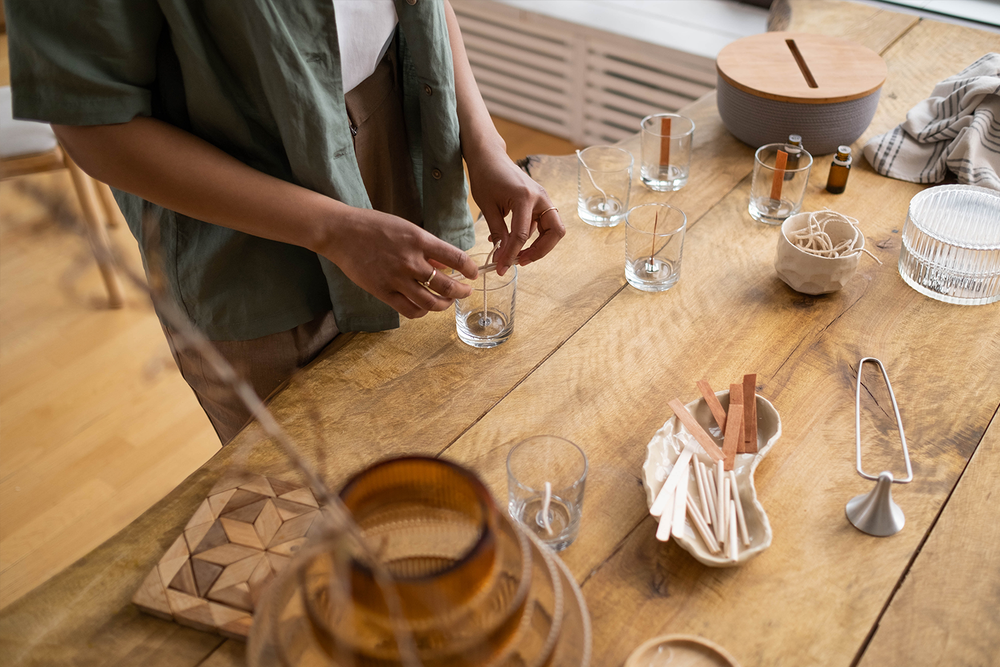
To begin the blending process, combine the carrier oil and essential oils in a clean glass bowl or bottle. Make sure that the container is sterilized beforehand to maintain the purity of your homemade facial oil. You can stir or shake the mixture gently using a clean spoon or by placing a lid on the container and giving it a good shake. This will ensure that all the oils are thoroughly blended together.
Remember to be gentle while mixing as excessive agitation can cause air bubbles and potentially reduce the shelf life of your facial oil blend.
Now that you have successfully mixed the oils, let's move on to transferring them into a suitable glass bottle for storage!
Transferring the Oil into a Glass Bottle
Now that you have successfully mixed your facial oil, it's time to transfer it into a suitable glass bottle for storage. Follow these steps to ensure the longevity and effectiveness of your homemade facial oil:
Choosing the Right Bottle
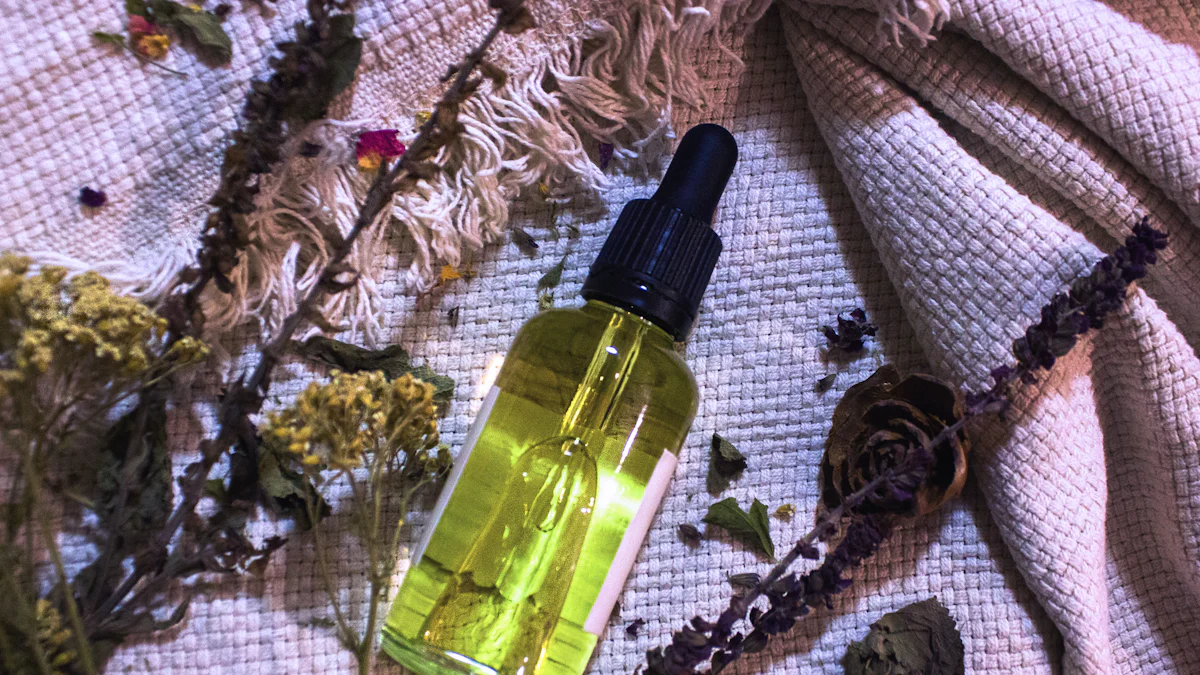
It's important to choose the right bottle for storing your facial oil. Opt for a dark glass bottle, such as amber or cobalt blue, as it helps protect the oil from sunlight and UV rays. This preserves the potency of the oils and extends their shelf life. Additionally, make sure that the bottle has a tight-fitting lid or dropper to prevent any leakage and allow for easy application.
Pouring and Storing
Carefully pour the mixed facial oil into the glass bottle, using a funnel if necessary to avoid any spills or wastage. Take your time during this step to ensure that all of your precious facial oil makes its way into the bottle.
Once transferred, seal the bottle tightly with its lid or dropper. It's crucial to store your facial oil in a cool, dark place away from direct sunlight and heat sources. Exposure to light and heat can degrade the quality of the oils and reduce their effectiveness over time.
By storing your homemade facial oil properly, you can maintain its freshness and potency for an extended period. Now that you have learned how to transfer and store your facial oil correctly, let's move on to exploring how to use it effectively on your skin!
Storing and Using the Facial Oil
Now that you have created your own facial oil, it's important to store it properly to maintain its freshness and effectiveness. Here are some storage tips to keep in mind:
Storage Tips
First and foremost, always keep your facial oil tightly sealed when not in use. This helps prevent oxidation and maintains the quality of the oils. Exposure to air can cause the oils to degrade over time, reducing their potency.
Additionally, it's important to avoid exposing the facial oil to extreme temperatures or humidity. Store it in a cool, dark place away from direct sunlight and heat sources. Avoid storing it in the bathroom where humidity levels can be high.
By following these storage tips, you can ensure that your homemade facial oil remains fresh and potent for a longer period.
Application Techniques
When it comes to using your facial oil, start with clean, dry skin. After cleansing and toning your face, apply a few drops of the facial oil onto your fingertips. Gently massage the oil into your face and neck using upward motions. This helps promote circulation and absorption of the oils into your skin.
Take this opportunity to pamper yourself with a mini facial massage. The gentle massaging motion not only helps distribute the oil evenly but also provides relaxation and promotes a healthy glow.
Remember that a little goes a long way with facial oils. Start with a small amount and adjust as needed based on your skin's response. You can use your homemade facial oil both morning and night as part of your skincare routine.
Now that you know how to store and use your facial oil correctly, let's explore the benefits of incorporating homemade facial oil into your skincare regimen!
Enjoy the Benefits of Homemade Facial Oil
Making your own facial oil at home allows you to enjoy a range of benefits for your skin. Here's why incorporating homemade facial oil into your skincare routine is worth it:
Customization: By creating your own facial oil, you have the freedom to customize it according to your skin's specific needs. You can choose carrier oils and essential oils that target your concerns, whether it's dryness, acne, or aging.
Natural and Organic: Homemade facial oil is a natural and organic alternative to commercial products that may contain synthetic ingredients or preservatives. You have control over the quality and purity of the ingredients used in your facial oil blend.
Nourishment and Hydration: Regular use of facial oil can provide deep nourishment and hydration to your skin. The oils help lock in moisture, leaving your skin soft, supple, and radiant.
Incorporating homemade facial oil into your skincare routine is a wonderful way to take care of your skin naturally. Experiment with different carrier oils and essential oils to find the perfect blend that suits your skin's unique needs. Enjoy the benefits of healthy, glowing skin with your very own homemade facial oil!