Easy Melt and Pour Soap Making For Beginners

Getting Started
Introduction to Melt and Pour Soap Making for Beginners
Welcome to the world of Melt and Pour Soap Making For Beginners! If you're looking for a beginner-friendly soap making craft, Melt and Pour is an excellent choice for soap making beginners.This method provides an easy process for crafting custom soaps without using lye or other harch chemical ingredients. Let's learn the basics of this fun and creative hobby.
Understanding Melt and Pour
What is Melt and Pour Soap Making?
Melt and Pour soap making is an enjoyable and uncomplicated method used for crafting personalized soaps without the necessity of handling lye, a harsh chemical commonly used in traditional soap making. Instead of starting from scratch with lye, this method involves melting down a pre-made soap base and then adding colors, fragrances, and other customizations to your liking. After preparing the mixture, it is simply poured into molds and left to solidify, resulting in your custom soap bars. This approach is particularly preferrred for beginners as it removes the requirement to work with strong chemicals, ensuring a safe and accessible introduction to soap making. Furthermore, it enables individuals to concentrate on the artistic aspects of soap making, such as selecting scents and designs, without the complexities associated with traditional methods. For those interested in exploring the world of soap crafting, the Melt and Pour technique offers an excellent starting point for this creative endeavor.
The History Of Soap Making
Soap making has a long history dating back centuries. For instance, the ancient Romans made soap by mixing rainwater, potash, and animal fat. The process involved rendering the fat by melting it down and filtering it. Then, a potash solution was added to the mix. The challenging part was that water and oil don't easily mix, so constant stirring and heating were necessary to keep the fat melted. Over time, a chemical reaction called saponification occurred between the fat and hydroxide, transforming the mixture into liquid soap. Once the fat and water no longer separated, the mix was left to cool. To separate the soap from excess water, salt, such as sodium chloride, was added. After being poured into the soap mold, it would take ages for soap to finally finish curing. Therefore, melt and pour has an major advantage compare to traditonal soap making technique. It successfully skip the complex sponification process, so you do not have to consume extra time for your handmade soap to cure.
Types of Soap Bases
Melt and Pour soap making has various soap bases, each with unique qualities like glycerin-based, shea butter-based, olive oil-based, and coconut oil-based. The glycerin-based soap bases are clear and gentle on the skin, great for most skin types. Shea butter-based soap bases are creamy and luxurious, perfect for dry or sensitive skin, and can improve texture and elasticity. Olive oil-based soap bases are moisturizing and gentle, creating a creamy lather suitable for all skin types, especially dry or mature skin. Coconut oil-based soap bases are known for their cleansing and lathering properties, producing a rich and bubbly lather suitable for cleansing and refreshing the skin. Choosing the right soap base depends on skin type and desired properties, and you can customize by mixing different bases or adding additional ingredients. Ultimately, the right soap base choice depends on your skin type and the properties you want.
Step By Step Melt and Pour Soap Making For Beginners
Directions:
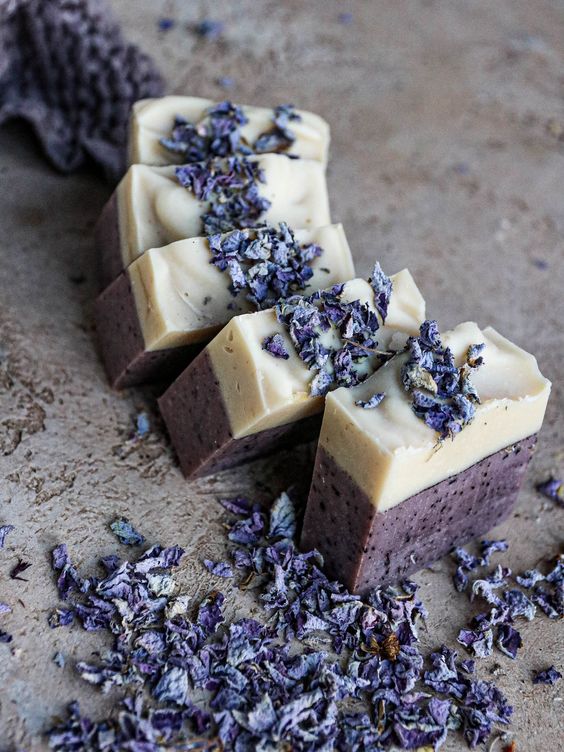
Creating hand-poured soap is a delightful and rewarding process that allows you to customize your soap with colors, fragrances, and designs. For this particular recipe, for a more simple and easy experience for soap makers, Ohcans candle has used dried rose petals with natural distilled rose toner as a natural coloring agent to replace food coloring powder or chemical dye. As for the second recipe, we used natural mugwort powder for adding a natural hue for your hand poured soap.
Material Needed:
25ml-----------------vegetable oil
200g-----------------soap base
50ml-----------------milk
12g------------------mugwort powder
12ml----------------dried rose bud with distilled rose toner* simply replace mugwort powder with this for recipe #2
weighting scale for measuring all your ingredients
A double boiler over heated water for melting solid form of your soap base.
A glass stiring stick for mixing liquid material all together.
Soap mold ( use traditions silicone ones)
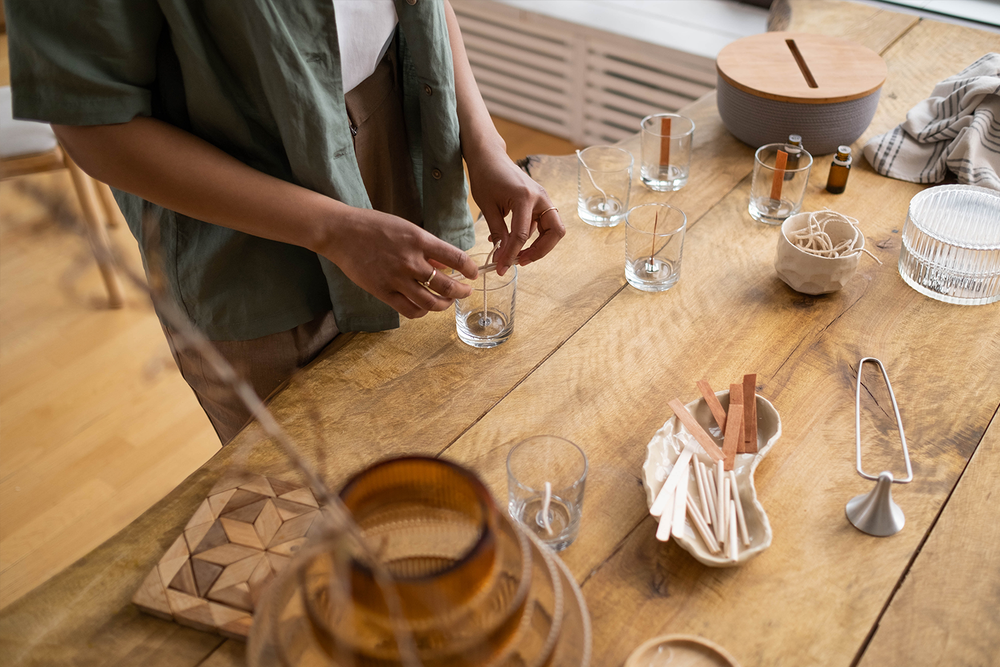
Step 1: Gather Your Material And Prepare Work Station
Clean and dry your molds, stirring stick, and containers. Sanitize your work area with rubbing alcohol or a 5% bleach solution, especially in the kitchen. To Acheive the best desired result for your hand poured soap, you want to dry everything to avoid cross contamination. Moreover, to avoid potential spills in the kitchen. You can cover the area of your workspace with newspaper. More importantly, to protect your eyes from contacting soap mixture, please wear safety goggles and rubber gloves for adding additional layer of protection.
Step2: Weighting All Your Vegetable Oil
This step is highly pivotal as having the fragrance oil ready beforehand will actively prevent any unwanted outcomes, such as the premature hardening of the soap. You want to measuring out 25ml of vegetable oil and set it aside.
Step3: Prepare Soap Base
Remove the soap base from packaging and cut it into small cubes on your cutting board. Place a large container on a scale and weigh the weight. Add the cubes to a sauce pan until it has approximately 200g. You can use a old used sauce pan or bowl for the purpose of making soaps. Use parchment paper for a smooth and easy clean up procedure.
Step 4: Melt Your Soap Base
Simply melt your solid form of soap base over water in a sauce pan or bowl. Essential, you want to fill your pot with 2 inch of water and bring it to a boil. You are aim for gentle and consistant heat for melting your soap base by place one bowl on top of another over heated boiling water. Another tip is you want your old used sauce pan or bowl to be heat proof ideally. You want want to accidently burn yourself I suppose. When making soap bars, ensure the temperature does not exceed 160ºF (71.1°C) to prevent the bars from feeling rubbery. You want to turn of the heat after 5 minute on boiled water. Another clear indication is you can observe that your solid soap base has melted into a liquid form without any clump.
Step 5: Add your Natural Colors For Handpoured Soap
Mix 50ml of milk with 12g of mugword powder first. Once the soap is completed melted in a liquid form, you can now add in your either 12g of mugword powder or 12ml of dired rosed petals toner water mixture. Remeber, your mugword or rose toner water has already been combined with 50ml of milk already. For option one, you will end up with a green and earthy colored soap with for the other. You will receive classice rose colored soap as a finish piece. You may notice a thin skin form on the surface of the soap as you are stirring the mixture. It is completely normal. Do not worry. Mugword powder will give your soap a natural herbal aroma while rose petal toner will transfer a natural classic rose scent to your soap.
Step 6: Pour Soap Base Into Mold
Add 15ml of vegetable oil to the mixture before pouring. Pour the soap into the mold slowly to prevent bubbles. Fill the mold to the top. Spray the surface with rubbing alcohol to remove any bubbles. You can spray multiple times, but make sure not to overdo it, as that can cause the soap to foam.
Step 7:Allow Time For Your Melt And Pour Soap To Cure
After 30 minutes, a thick skin will form on the soap. Loosely cover the mold with plastic wrap and let it cool undisturbed for 24 hours. For easy handling, place the mold on a cookie sheet. Cleaning up is simple—wash with water and a scrub brush. By the way, ideally, you want to Allow the soap bars to cool at room temperature for several hours or overnight.
Dejar un comentario