5Tips For Making DIY Woodwick Candle
Elevate Your Candle Experience
Are you a candle enthusiast looking for budget-friendly woodwick candles? Look no further! In this section, we will delve into the world of woodwick candles and how they can enhance your candle experience without breaking the bank.
Woodwick candles are known for their unique crackling sound, which adds an extra layer of ambiance to any space. But there's more to these candles than just their soothing sound. We'll explore the science behind the cracking effect in woodwick candles and provide insights on how to maintain their longevity.
Our goal is to help you choose and care for budget-friendly woodwick candles that will elevate your candle experience. Whether you're a DIY enthusiast or simply love creating a cozy atmosphere at home, these tips will come in handy.
By opting for budget-friendly woodwick candles, you can enjoy all the benefits they offer without straining your wallet. From affordable options to low-cost alternatives, we'll guide you through the process of finding the perfect woodwick candle that suits your preferences and fits within your budget.
So get ready to discover the secrets behind the crackling sound, learn how to extend the lifespan of your woodwick candles, and unlock a whole new level of relaxation with our 10 tips for choosing and caring for these affordable gems.
Let's dive in and elevate your candle experience with budget-friendly woodwick candles!
The Science Behind the Cracking Sound
The crackling effect in woodwick candles is a result of careful engineering and design. The factors influencing this mesmerizing sound include the type of wood used in the wick, its thickness, and its placement within the candle.
Woodwicks are typically made from natural hardwoods like cherry or birch. These woods have unique properties that allow them to create a sizzling sound when burned. The crackling effect is further enhanced by the specific cut and shape of the wick.
The construction of woodwicks plays a crucial role in producing the desired sound. They are designed with multiple layers, including a soft inner core surrounded by harder outer layers. This combination allows for controlled burning and consistent crackling throughout the candle's lifespan.

Maintaining Woodwick Candle Longevity
To ensure your woodwick candles last as long as possible, it's essential to follow proper care techniques. Here are some tips and tricks to extend their lifespan:
-
Trim the Wick: Before lighting your woodwick candle, trim the wick to approximately 1/8 inch. This helps maintain an optimal burn rate and prevents excessive flickering or soot buildup.
-
Burn Time: Allow your woodwick candle to burn for at least two hours during each use. This ensures that the entire top layer of wax melts evenly and prevents tunneling.
-
Avoid Drafts: Place your woodwick candle away from drafts or air vents that can disturb its flame and cause uneven burning.
-
Extinguish Properly: When extinguishing your woodwick candle, use a snuffer or gently blow out the flame instead of blowing directly onto it. This helps prevent hot wax from splattering or damaging the wick.
-
Store Carefully: When not in use, store your woodwick candles in a cool, dry place away from direct sunlight or extreme temperatures. This helps preserve their fragrance and prevents warping or melting.
By understanding the science behind the cracking sound in woodwick candles and implementing these maintenance tips, you can enjoy their soothing ambiance for longer periods while maximizing their value.

How To Make Woodwick and Woodwick Candle Itself.
Exploring DIY Method For WoodWick Itself
You may wonder what is so special abou the woodwick itself? Is there a more cost effective way to create such wood wick in bulk numbers? In fact, Ohcans candle has especially prepared an easy tutorial for you .
As we all known for sure, the wick is an important part of the candle.It allows the candle to burn more consistently. Generally speaking, candle wicks are made of metal, cotton thread, wood and other materials. Among them, wooden candle wicks are more environmentally friendly and highly favored. Here's a way to make wooden candle wicks. We have tested multiple times with so many trials and errors for our beginner candle makers.

Candle wick Supplies Needed:
1.Wood strips: choose starch board or hardwood
2.Tension thread: you can choose mesh wire or cotton linen thread
3.Wax: You may choose beeswax or vegetable soy wax. It is up to you to decide.
4.Balance ruler, clippers, clamps, scissors, blades.
Procedures:
1.Cut as many strips of wood as you need, to a thickness of 03cm, a width of 2cm and a length of your choice. The cut strips of wood need to be dried well.
2.Lay a well-dried strip of wood flat on the table, take out the tension thread, place the strip of wood on the thread, and use scissors or a razor blade to wrap it along the sides of the strip. The spacing should be about 1.5 mm.
3.Hold the ends of the dowel with clamps. Tighten the wick, making sure that the thread fits well against the dowel.
4.Place the cut wax packet on the surface of the wick and place the wick in the cooling chamber in your refrigerator to cool.
5.When the wax packets have hardened and solidified, cut the paper to the appropriate size and punch holes. The holes should match the size of the dowel so that the wax packet can pass through.
6.The wood wick is made when all the wax packets have passed.
Tips To Keep in Mind
-
The choice of wood strip is important. it is best to choose one that is sturdy and does not interfere with combustion.
-
The wax used should be solid enough, otherwise the wick will tend to break or snap. Since every candle is different, each wooden wick needs to be cooled and punched.
-
If you need a longer wick, cut multiple strips and link them together. This makes a longer wick.
-
When carrying out a burn test, care should be taken to cut the wick length as soon as the flame exceeds 0.5cm from the top of the wick.
How To Select Your Candle Wick For The Right Candle
The right wick is essential for a perfect burn.
We have summarized the basics of 3 common wax materials and their usage profiles, and at the end of this article, there are even burning problems corresponding to wax wicks that are too thick or too thin, so hurry up and bookmark it~!
Cotton Wick
-Analysis: Made of 100% natural fiber. It is a cheap and commonly used wick in handmade candles. It is waxed or unwaxed, and the flame temperature is higher than other wicks.
-Applicable: Unwaxed cotton wicks are suitable for making pillar wax, mold wax and most other modeling waxes. After waxing, the wicks are hard, easier to bend and shape or stand upright, and can be used for container wax or small candles with holes punched after clamping.
-Others: When purchasing, please pay attention to the burning diameter of the wick. The larger the number of strands, the larger the surface of the wax to be burned and melted.
-Other: When purchasing, please note the burning diameter corresponding to the number of strands.
Eco Wick
-Analysis: Made of cotton candle wick and paper fiber mixed weave. Easy to operate, stable spark without black smoke, can adjust the length automatically, differentiated between over-waxed and unwaxed.
-Application: Finished wicks with over-waxed sandwich tray are suitable for making container candles such as glass cup wax, tin can wax and candles with holes punched after demolding.
-Other: American A&P ECO, HTP, CD series are mixed paper fiber environmentally friendly wicks, when purchasing, you need to pay attention to the different suitable sizes of containers, pillar wax and flame height, wax pool diameter and other data.
Wooden candle wicks
-Analysis: Made of two thin pieces of wood laminated or crossed. It burns with a strong sense of ambience, with the crackling sound of sparks rubbing together, burns more unstably and produces a small amount of residual ash.
-Application: Mainly used with natural waxes such as soy wax to make container candles.
-Other: need to soak or drip wax solution before making, when purchasing, please pay attention to the burning diameter corresponding to the length and width of the wood pieces.
-Application: mainly used with natural waxes such as soy wax to make container candles.
Common Problems
Wick too thin: flame too small; wax pit, difficult to burn flat; easy to extinguish when burning.
Candle wick too thick: too high a flame; carbon buildup at the end of the wick; black smoke when burning; black cup wall
Before lighting the candle, remember to trim the wick to about 6mm to ensure that the candle is fully burned to avoid particles falling and polluting the candle or generating black smoke.
Unleash Your Creativity with DIY Alternatives
If you're feeling adventurous and want to add a personal touch to your candle collection, why not try making your own woodwick candles? In this section, we'll guide you through the process of creating homemade woodwick candles and explore alternative options for a unique candle experience.How many of you have been shopping at IKEA and were drawn to its scented candles? While it's a good value at first glance, this strong scent seems to be only suitable for the bigger malls like Ikea, and when I took it home, I found that the smell was just too overpowering!
Not to mention the repetitive flavors, it lacked that much meaning when it comes to price and value ratio. You can create more interesting flavers if you choose to create your own.

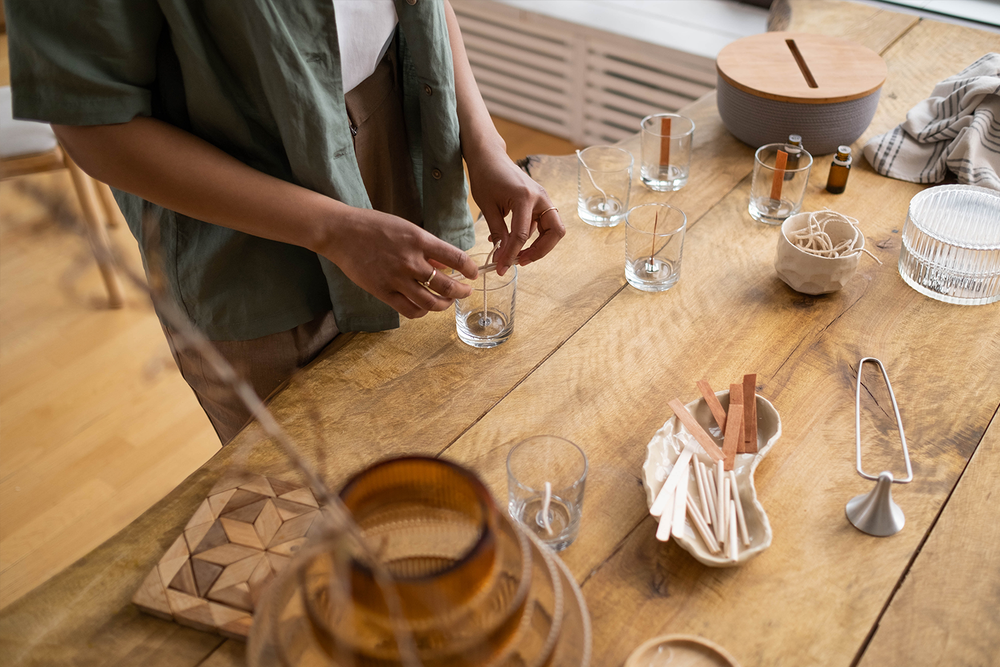
Making Your Own Woodwick Candles
Creating your own woodwick candles can be a rewarding and fulfilling DIY project.Making scented candles is a fun craft activity that allows you to create delightful aromas for your home. Here are the steps to making your own woodwick scented candles:
Materials needed:
Candle wax or wax coals,
Candle wicks or wooden wicks,
Essential oils (choose according to your preference),
Pot,
Heat source,
Thermometer,
Color Dye (optional),
Melting Container
Stirring Stick,
Candle mold (optional),
Steps:
PREPARE WORK AREA: Line your work area with newspaper or plastic sheeting to prevent candle wax from staining the surrounding area. Make sure the work area is well ventilated.
PREPARE CANDLE WAX: If you are using candle wax, cut it into small pieces so that it melts more easily. If you are using wax coals, prepare them as well.
Prepare the wick: Attach the wooden wick to the bottom of the candle mold. Make sure it stands up vertically in the mold.
MELTING WAX: Heat candle wax in a saucepan until it is completely melted. Use a thermometer to make sure the temperature is within a safe range.
ADD ESSENTIAL OILS: Once the wax is melted, stir well and add your favorite essential oils. Adjust the amount of essential oils to your liking.
ADD COLOR (OPTIONAL): If you want colored candles, you can add color dyes in this step. Mix well to ensure even distribution.
INFILL THE MOLD: Pour the wax into the candle mold, covering the wick. Make sure the wick stays centered.
COOL AND CURE: Allow the candle to cool at room temperature until fully cured. This may take a few hours depending on the size and thickness of the candle.
Trim the candle: Once the candle is cured, trim the top to ensure it is flat. You can trim the length of the wick to make it suitable for burning.
LIGHT THE WOODWICK SCENTED CANDLE: Now you can light your homemade scented candle and enjoy its pleasant aroma.
You can search for goods and supplies hiding in your junk drawers to made this wood wick candle. There are many alternative to making this candle.
Leave a comment