How To Make An Decorated Pillar Candle?
Making scented candles is a delightful and straightforward craft that allows you to craft your own soy wax pillar candles. These candles not only emit a warm glow but also infuse your surroundings with a delightful fragrance. With minimal supplies and a bit of creativity, you can easily fashion a unique candle for a cozy and aromatic ambiance. Let's break down the process step by step, making it hassle-free for you to create your personalized soy wax pillar candle.
Suppies That You Need:
- Ohcans Soy Wax: This eco-friendly option offers a clean burn, ensuring both your space and the environment stay fresh.
- Candle Mould: Choose a mould style that resonates with you, setting the tone for your candle's appearance.
- Candle Wick: Match the wick to your mould size for consistent burning.
- Food Dyes: Food dyes give you multiple colors to your wax.
- Pour Pot: A handy tool for precise wax pouring.
- Measuring Beaker : This gives you added advantage for pouring hot wax.
- Ohcans Bees Wax: This naturally harvested wax by honey bees. It is free from synethetic compound while retaining its organic and non-toxic nature.Bees wax will exudes a very light natural fragrance of honey and pollen. Ohcans candle will be releasing more candle making supplies coming next year.
- A saucepan: This melting pot will give you more secured protection when melting your wax.

How To Make Decorated Pillar Candle
First, let's make pillar candles. I use a 2:8 beeswax, soy wax here.This is just the ideal ratio to control the hardness of pillar candle. This is just my usual default ratio. You can make adjustment to your liking.
Measure out your wax
- Measure your wax on a food scale.
Prepare Your Mold
2.And then as for the mold part, I'm using a 5cm diameter column candle mold today.
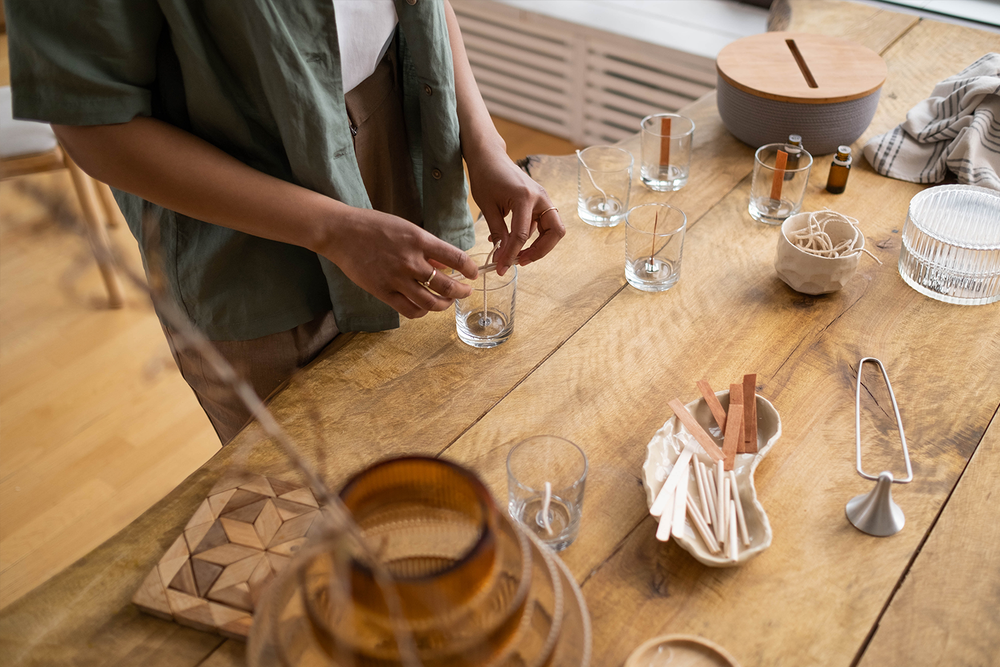
Thread Your Candle Wick
3. Before we pour in the candle solution, we need to thread the wax wick into the molds
4.After threading the wick,we can glue it in place with a blu tack.
5.Keep an eye out for this step and remember to cover the emptyhole all the way around with blue tack. Doing so prevent wax dripping off without notice.
6. Before the wax is poured in, we can warm the mold with a hot air gun This is to eliminate the great temperature difference between wax and mold.
Melt Your Wax
7.Heat your wax over a saucepan over 75c.Please remember to constantly keep an eye on the temperature.
8.You can prepare to pour your wax solution after it has reached its liquid state. Just like the picture shown below.

9.To keep everything simple, we will not be adding any fragrances for the time being.
10.To make a pillar candle with the effect of mixed lava, we have to keep an eye on the solidification of the candle, when the outer layer of the candle has already solidified by 3-5mm, at this time, use the wax wick to loosen all the layers in the center.
11.Next we pour the liquid solution out into our saucepan.
12.Then we divide the wax into equal parts according to the number of lava colors. We can use natural organic food coloring during this process.
13.We decide to make 3 colors for this project. Add individual food coloring to each and every wax portion.
14.Then, at about 60 degrees, pour the blended wax back into the mold. Just a kind reminder, During this process, it is a good idea to not keep the the temperature of the wax too high.
15.Remember, you don't necessarily have to wait for the last color to completely set when you go into the molds. This way you can achieve a very good marble effect within the cylinder shaped candle.
16.Then we can use a tool to fix the wick in the center, although my personal habit is to use a wooden chopstick to fix it, of course at this point you can also use an available wick holder on the market or craft sticks.
17.After the wax has completely solidified, we have to pour a small amount of white wax into the mold.
18.That's how you can cover the completely colored part.While waiting for it to solidify, we can prepare some three-dimensional decorations and embellishment.
19.Next comes the assembly part.

20.We will use candle glue to attach the decorations to the pillars.During this step, you can also use other tools such as Oil Scraper and Tweezers to properly place the decoration。
21.Now, This ombre pillar candle with decorations is now complete!

If you are looking for video tutorials, check it out here:
What Are Some Key Pointers For Successful Candle Making?
Beware of Wax Dripping
-
Try not to hit the side of the mold with wax while pouring; drips will set very fast and sometimes can't melt enough from the heat of the mold. This can cause the candle to stick to the mold and make releasing it difficult.
Step by step Follow Up
- Candle making may seem very hard for beginners, but if one can break down the process into manageable steps makes it easy for anyone to get a head start on this creative project.
Basic Candle Maing Supplies
- All the candle making supplies you will ever need to get started is very simple. soy wax, a mould, wick, fragrance oil, and a saucepan.
Temperature Is the Key
- Sometime temperature you pour your wax can cause multiple issues such as cracking, unwanted bubbles,blemishes. This happens when the temperature is too low. Under the condition if it is too high, it will result in excessibe shrinkage of the candle. For example ,originally, We may have 200grams of wax to begin with,but at the end, we may be left with 50grams.
- The ideal temperature is 135F~195F, While the temperature ideal for pouring remains to to 120F.

Placement of The Wick
- Wick Placement: Properly preparing and positioning the wick ensures an even burn and enhances the overall performance of your candle . If the wick is not placed properly, it will cause tunneling and excess soot. Wick!Wick!Wick! Remeber?
Patience Is the Key
- You will be rewarded for being patient enough. Allow your candles to solidify and set properly. You will have to respect the curing period for candles. Generally, we have a cure by date to set 1~2 weeks before we take out to light it with a match.
- Not being patient when making candles may cause layers to exude multiple layters. This way, you would not be able to get a good looking candle.
Making pillar candles is a nice way to add a personal twist to a handmade gift. When you put your heart and mind into the crafting procedure, you effort will turn out be a success. We hope that with need patience and care, you will have a candle that smell nice and looks appealing to the eye.
FYI: Remeber to Tag Ohcans Candle on Instagram and Pinterst with your finished work, you will receive free candles when you become our fans on Pinterest.
Leave a comment